Ableton Live 12 brings a ton of powerful features, and today we’re diving deep into Auto Pan— one of the most underrated but highly effective modulation tools in music production. Whether you’re looking to create subtle stereo movement or extreme rhythmic effects, Auto Pan has you covered.
In this post, I’ll break down how it works, showcase some creative ways to use it, and share a few tips to get the most out of it in your productions. Plus, I’m giving away some of my personal Ableton Auto Pan presets to Patreon members—so don’t miss out!
What is Auto Pan?
Auto Pan is a modulation effect in Ableton Live 12 that allows you to control the stereo placement of a sound automatically. While it’s commonly used for simple panning effects, it can also be used creatively for tremolo effects, rhythmic movement, and even sidechain-style volume modulation.
How to Use Auto Pan in Ableton Live 12
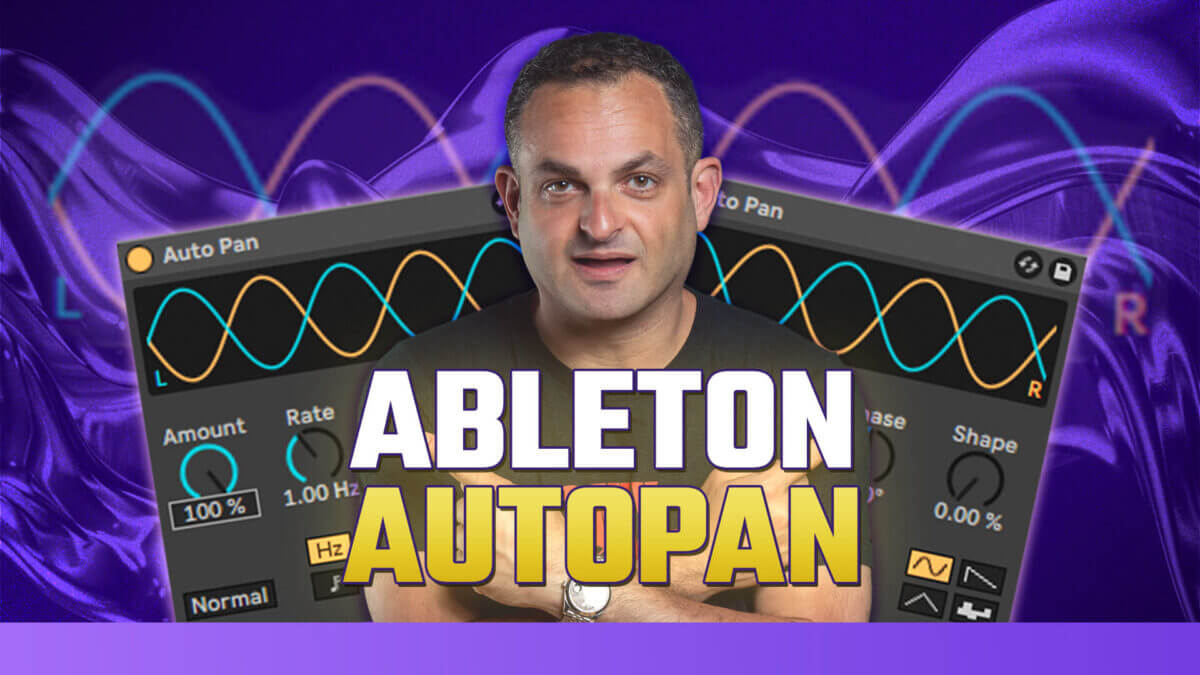
Auto Pan Overview
Auto Pan features several parameters that give you precise control over how the effect interacts with your sound:
- Rate: Determines the speed of the panning modulation.
- Shape: Adjusts the modulation waveform (sine, square, triangle, etc.) for different movement styles.
- Phase: Controls how the left and right channels move relative to each other.
- Amount: Determines the intensity of the panning effect.
- Sync vs. Free Mode: Let’s you sync the effect to your project’s tempo or set a custom rate.
Examples of Auto Pan
Now that we’ve covered the basics, let’s look at some real-world examples of how Auto Pan can be applied:
- Stereo Movement for Pads & Leads – Create subtle motion in synths or pads to make them feel wider and more immersive.
- Dynamic Drum Processing – Use Auto Pan to add bounce to hi-hats, claps, or percussion, making them feel more alive.
- Tremolo-Style Effects – By setting the Phase to 0°, Auto Pan can be used as a tremolo, creating amplitude modulation instead of panning.
Cool Use Cases with Auto Pan
Auto Pan can be pushed even further with some creative techniques:
- Pumping Effect Without a Sidechain – By setting Auto Pan’s waveform to a sawtooth shape and adjusting the timing, you can create a pumping motion similar to sidechain compression.
- Reverse Gating Effects – Using a square wave shape, you can create rhythmic volume chopping effects, perfect for glitch and stutter-style production.
- Experimental Vocal Processing – Applying Auto Pan to vocal chops can create unique movement, helping them creatively cut through the mix.
More In-Depth Use Cases with Resampling in Ableton Live
For more advanced applications, resampling Auto Pan’s movement can unlock even more possibilities:
- Capturing Automation – Record Auto Pan’s modulation as an audio clip and manipulate it further.
- Layering with Other Effects – Combining Auto Pan with delay, reverb, or frequency shifting can create unexpected, evolving textures in your music.
Auto Pan is one of those simple but powerful tools in Ableton Live 12 that, when used creatively, can completely transform your sounds. Whether you’re adding subtle stereo movement or designing intricate rhythmic patterns, this effect is a must-have in any producer’s toolkit.
Download My Auto Pan Presets!
If you want to save time and instantly improve your workflow, I’m giving away some of my personal Auto Pan presets to my Patreon members. These presets include a variety of effects, from subtle stereo widening to extreme rhythmic gating—perfect for adding movement to your mixes.
➡️ Join my Patreon here to get access to these presets!
What’s your favorite way to use Auto Pan? Drop a comment below!
🎥 Related Videos
If you enjoyed this breakdown, check out my other Ableton Live tutorials:
▶ How to Create Stutter House Music Effects
▶ Stutter House Music Effects (Members Only)